


How to use the Laravel Backup package by spatie in a Laravel application
Exploring the package for database backup for a Laravel application


Table of contents

No headings in the article.
In this article, we'll be looking at how to back up the database of a Laravel application using the Laravel backup package from spatie

A modern backup solution for Laravel apps
This Laravel package creates a backup of your application. The backup is a zip file that contains all files in the directories you specify along with a dump of your database. The backup can be stored on any of the filesystems you have configured in Laravel.
Feeling paranoid about backups? No problem! You can backup your application to multiple filesystems at once.
I'll be using this article: Laravel 9: Building a blog application with Bootstrap 5 to demo the usage of the Laravel backup package.
Basic installation
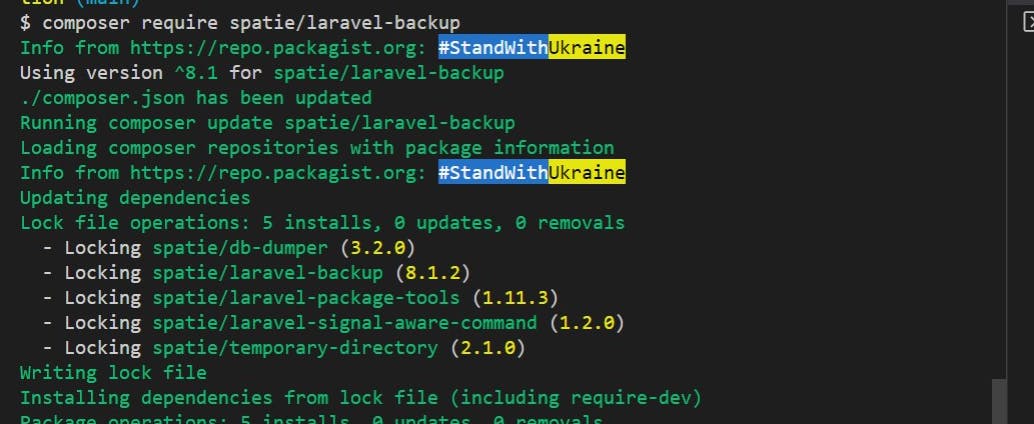
You can install this package via composer using:
composer require spatie/laravel-backup
The package will automatically register its service provider.
To publish the config file to config/backup.php run:
php artisan vendor:publish --provider="Spatie\Backup\BackupServiceProvider"

The default contents of the configuration are found in the config/backup.php file
You can customize the configuration based on your requirements.
There are different channels for notification and backup of the application
We'll be sticking with the mail configuration in the blogging article.
Spatie automatically sends mail regarding the backup when the command is been executed.
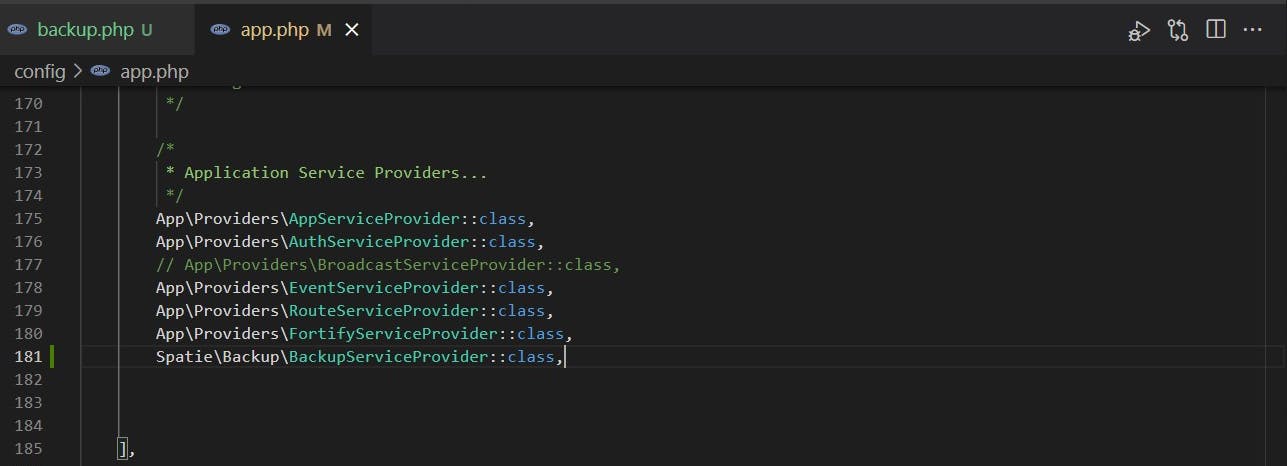
Register the Spatie service provider in the app.php file
Spatie\Backup\BackupServiceProvider::class,
Configuring the backup disk
By default, the backup will be saved into the public/laravel-backup/ directory of your laravel application. This folder most probably is configured to be public. We recommend that you create a disk named backups (you can use any name you prefer) in filesystems.php and specify that name in the disk key of the backup.php config file.
Scheduling
After you have performed the basic installation you can start using the backup:run, backup:clean, backup:list and backup:monitor-commands. In most cases you'll want to schedule these commands so you don't have to manually run backup:run everytime you need a new backup.
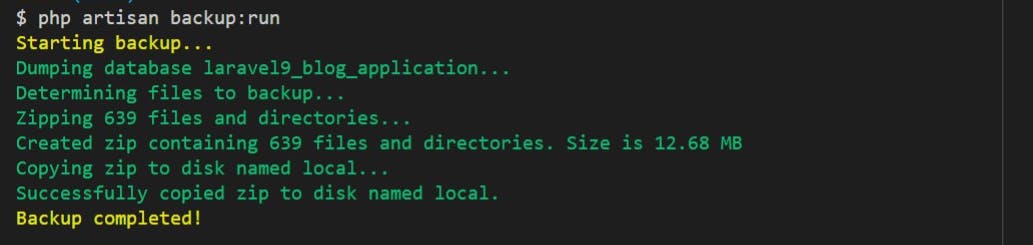
Let's run the command below to backup the database.
php artisan backup:run
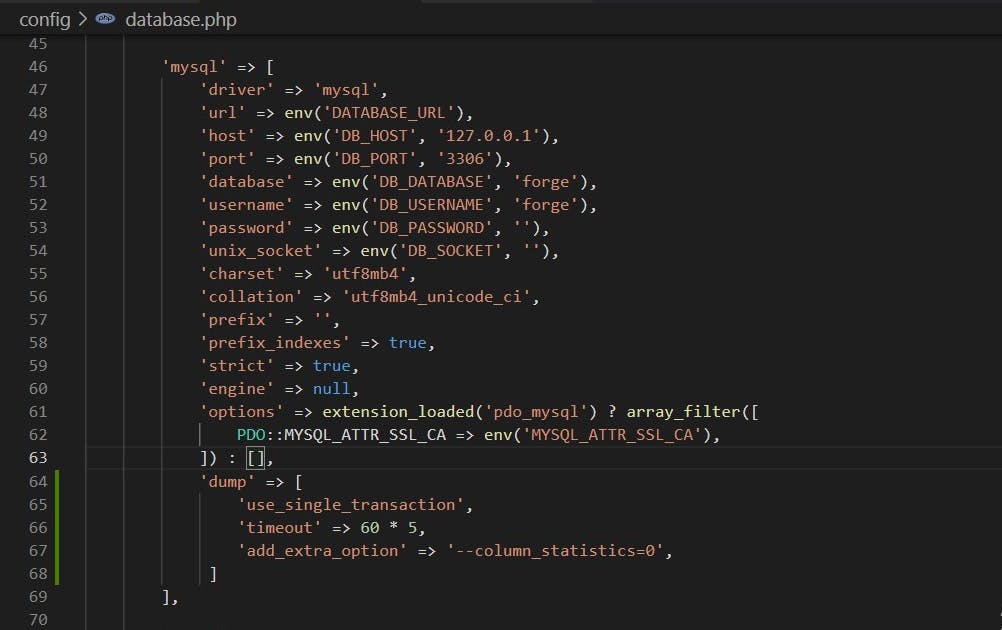
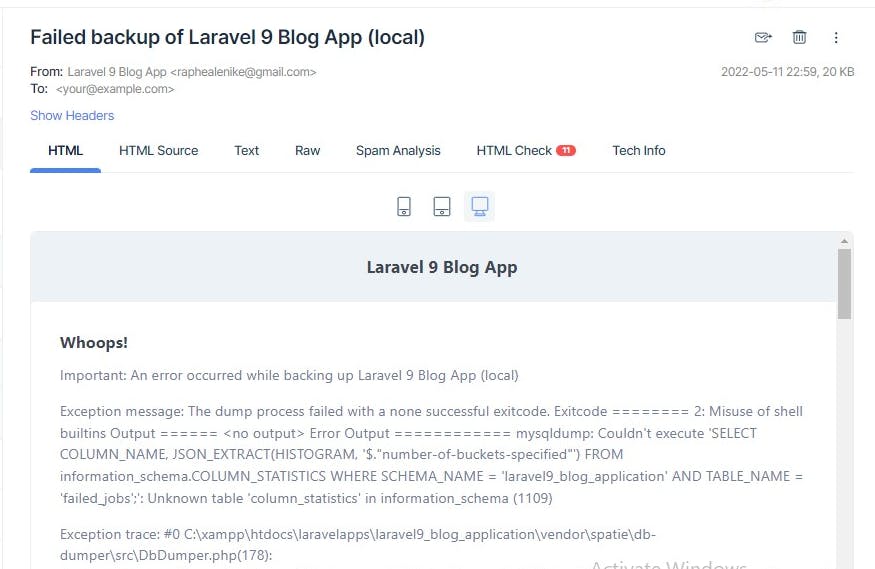
You may likely get an error like this

If that's the case kindly go to the database.php file and update the MySQL driver settings.
            'dump' => [
                'use_single_transaction',
                'timeout' => 60 * 5,
                'add_extra_option' => '--column_statistics=0',
             ]
Run the backup command again
php artisan backup:run
Let's go check our mail. For this blog application, I'm using Mailtrap for testing.
Mail notification for failed backup which is useful when the backup is been scheduled to be executed using cron jobs
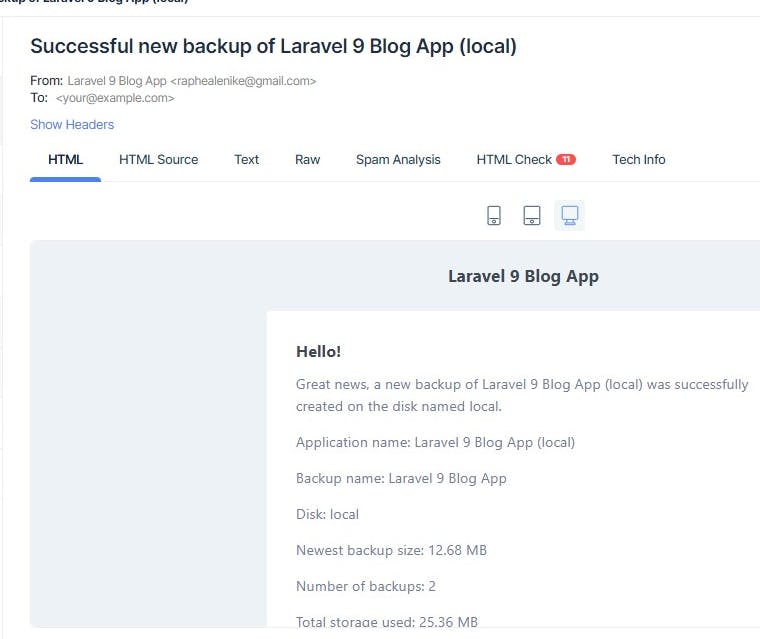
Mail notification for a successful backup of the application
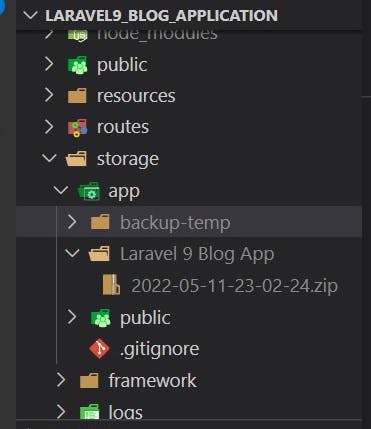
The zip file of the backup is located in the storage/app/ folder
The commands can be scheduled in Laravel's console kernel, just like any other command.
// app/Console/Kernel.php

protected function schedule(Schedule $schedule)
{
   $schedule->command('backup:clean')->daily()->at('01:00');
   $schedule->command('backup:run')->daily()->at('01:30');
}
If a backup cannot be taken successfully, the backup:run command returns an exit code of 1 which signals a general error, so you can use laravel's task hooks to specify code to be executed if the scheduled backup succeeds or fails:
   $schedule
      ->command('backup:run')->daily()->at('01:00')
      ->onFailure(function () {
         ...
      })
      ->onSuccess(function () {
         ...
      });
Monitoring
If your application is broken, the scheduled jobs cannot run anymore. You might also simply forget to add a cron job needed to trigger Laravel's scheduling. In either case, you may think backups are being made when in fact nothing is being backed up.
To find out about problems with your backups, the package ships with monitoring functionality. It will inform you when backups become too old or when they take up too much storage.
Learn how to set up monitoring.
Dumping the database
mysqldump is used to backup MySQL databases. pg_dump is used to dump PostgreSQL databases. If these binaries are not installed in a default location, you can add a key named dump.dump_binary_path in Laravel's own database.php config file. Only fill in the path to the binary. Do not include the name of the binary itself.
If your database dump takes a long time, you might exceed the default timeout of 60 seconds. You can set a higher (or lower) limit by providing a dump.timeout config key which specifies, in seconds, how long the command may run.
Here's an example for MySQL:
//config/database.php
'connections' => [
    'mysql' => [
        'driver'    => 'mysql'
        ...,
        'dump' => [
           'dump_binary_path' => '/path/to/the/binary', // only the path, so without `mysqldump` or `pg_dump`
           'use_single_transaction',
           'timeout' => 60 * 5, // 5 minute timeout
           'exclude_tables' => ['table1', 'table2'],
           'add_extra_option' => '--optionname=optionvalue', // for example '--column-statistics=0'
        ]
    ],
FILE EXTENSIONS OF DATABASE DUMPS
By default, database dump files are named .sql, except for the MongoDB driver which is named .archive. If you would like to override this, you can set the file extension to be used in the config.
For example, to save a database dump as a .txt file:
//config/backup.php 'backup' => [ ..., 'database_dump_file_extension' => 'txt', ], This relates to the names of the database dump files within the overall backup zip file that is generated.
CUSTOM DATABASE DUMPERS
If you need to have a custom database dumper for a driver, you can use DbDumpFactory::extend(). It expects the first argument to be the driver name and the second to be a callback that returns an instance of Spatie\DbDumper\DbDumper.
DbDumperFactory::extend('mysql', function() {
    return new YourCustomMysqlDumper();
});
use Spatie\DbDumper\DbDumper;

class YourCustomMysqlDumper extends DbDumper
{

}
Thank you for reading this article!!!.
If you find this article useful please kindly share it with your network and feel free to use the comment section for questions, answers, and contributions.