How to create custom commands in a Laravel application
Exploring the creation of custom commands in a Laravel application
Introduction
In this article, we'll be looking at how to create custom commands in a laravel application (even in version 9) to perform customized or defined actions.
A command is simply an instruction that is given the ability to perform a task.
In a Laravel application, sometimes there is the need for a command to perform an action (s) outside of the browser or based on any type of activity.
For instance, if you may want to pull a certain record from an endpoint to use in a form in a laravel application the command feature comes into play. This is helpful because you won't have the need to be making the calls to the endpoint at every instance.
A command can be executed to retrieve the endpoint JSON response and save it into a database.
Artisan Console
The laravel commands are executed via the Artisan console.
Artisan is the command-line interface included with Laravel. Artisan exists at the root of your application as the artisan script and provides a number of helpful commands that can assist you while you build your application.
Benefits of writing Laravel commands
Remove the workload of manually repeating tasks based on conditions on production applications
It can be used to set up an application ( for instance we can run a command that asks the user the name of the database, type of connection, user_name etc from the artisan console)
Makes the work easier for another developer to easily adjust the behaviour of the command for a condition or task rather than navigating through several methods in different controllers.
Can be used to perform a large task that requires more time to be accomplished.
It's helpful during the development process of an application where some activities can be performed from the command even without interacting with the browser.
Examples of artisan commands in laravel
- php artisan serve (serves the application )
Laravel commands can also accept arguments or parameters
if the --port parameter is added it serves the application on a specific port
php artisan serve --port=8002 serves the application on 127.0.0.1:8002
- php artisan migrate
creates tables for the application.
- php artisan make:controller PostController
creates a controller with the name PostController
In order to keep this article simple and precise, I'll be using this laravel blog application to demonstrate how to publish a blog post from the command line with options.
php artisan make:command (is used to create a command in Laravel)
Create a Command to create a blog post
Let's create a command to create a blog post.
The essence of this command is to create a blog post.
php artisan make:command CreateBlogPost

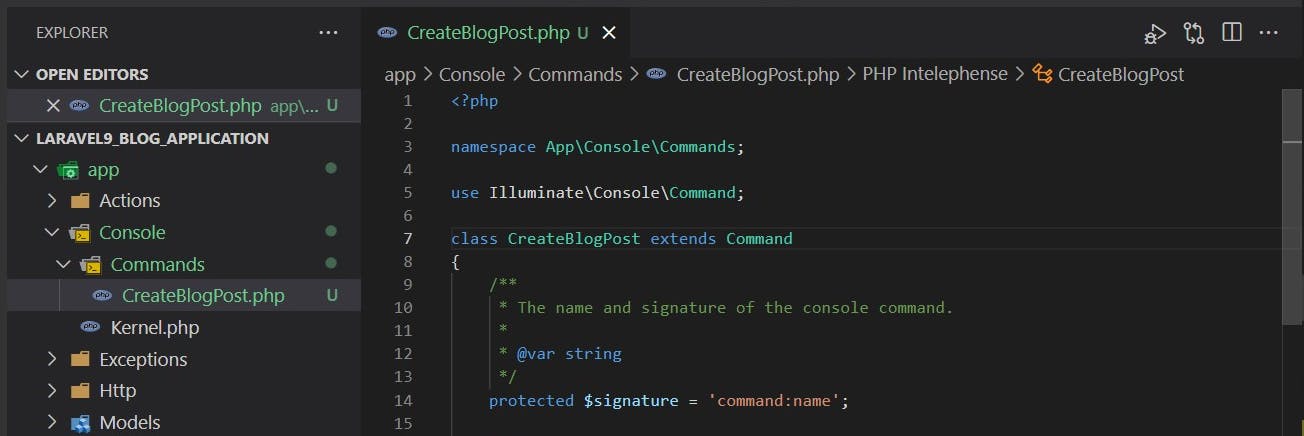
All the custom commands created can be found in the app/console/commands folder

**The CreateBlogPost command class **
<?php

namespace App\Console\Commands;

use Illuminate\Console\Command;

class CreateBlogPost extends Command
{

    /**
     * The name and signature of the console command.
     *
     * @var string
     */

    protected $signature = 'command:name';

    /**
     * The console command description.
     *
     * @var string
     */
    protected $description = 'Command description';

    /**
     * Create a new command instance.
     *
     * @return void
     */
    public function __construct()
    {
        parent::__construct();
    }

    /**
     * Execute the console command.
     *
     * @return int
     */
    public function handle()
    {
        return 0;
    }
}
Let's update this command to create a blog post for this application
The signature (the name of the command)
protected $signature = 'blog:create-post';
The command description (this is important for clarity purposes in a case where the name might not be sufficient to convey the meaning in the future or to another developer )
protected $description = 'A command to create a post for this blogging application';
- Creates a new command instance.
Laravel goes ahead and sets the name, description, and parameters on the console commands just to make things a little easier on the developer. This is so they don't have to all be manually specified in the constructors.
public function __construct()
    {
        parent::__construct();
    }
There are other protected parameters such as
$help (The console command help text)
$hidden (Indicates whether the command should be shown in the Artisan command list.)
The handle method that executes the console command
    public function handle()
    {
    //creates a blog post for a user
        Post::create([
            'title' => Str::random(10),
            'description' => Str::random(10),
            'user_id' => 1
        ]);

    //logs the message on the console.
        $this->info('Blog post created successfully!!!');
    }
Next
Save and let's head over to the command-line interface to run this command
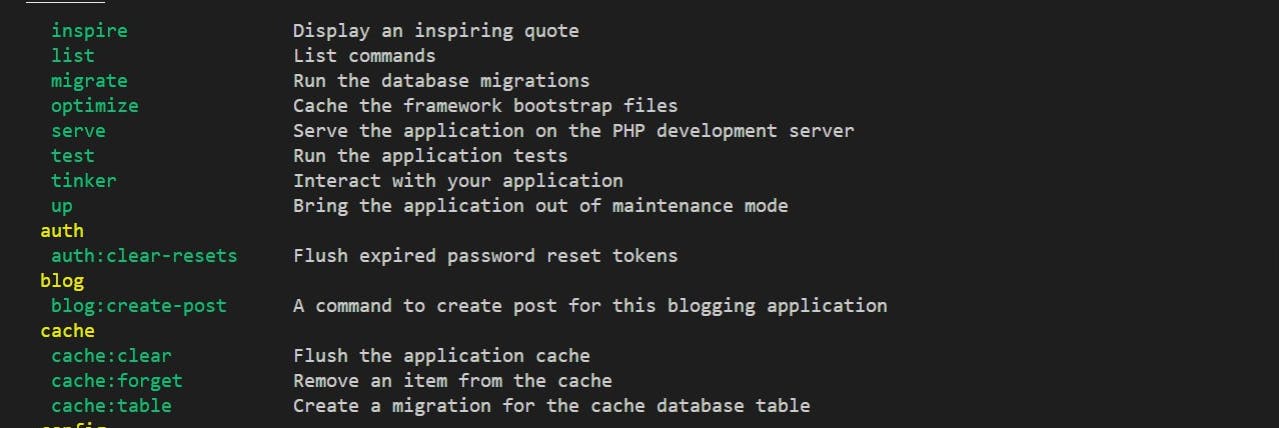
View List of Commands
To view the list of commands
php artisan list

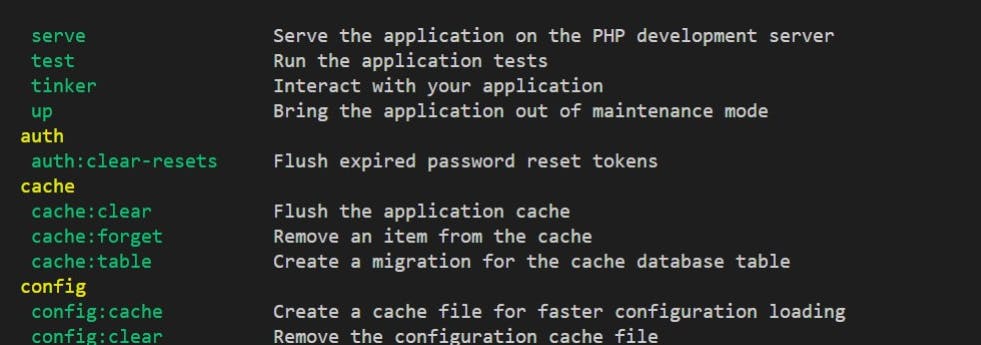
To hide the command set hidden to true
protected $hidden = true;
Run the artisan list command
php artisan list

Run the create blog post command
php artisan blog:create-post

In a case where we needed the title, description etc to be passed in with the command as arguments?
- For example: php artisan blog:create-post title="Laravel commands" --description="How to create laravel commands"
Let's update the signature and the handle method
protected $signature = 'blog:create-post {title} {description} {user_id}';
Add the ? to make any parameter optional and must come after the required parameter.
protected $signature = 'blog:create-post {title} {description?} {user_id?}';
- handle method
    public function handle()
    {
        $title = $this->argument('title');
        $description = $this->argument('description');
        $user_id = $this->argument('user_id');

        Post::create([
            'title' => $title != '' ? $title : Str::random(10),
            'description' => $description != '' ? $description : Str::random(30),
            'user_id' => $user_id != '' ? $user_id : 1
        ]);

        $this->info('Blog post created successfully with!!! '. $title. ' as title');
    }

Another example with flag: php artisan blog:create-post --title="Laravel commands" --description="How to create laravel commands"
- Update the signature
protected $signature = 'blog:create-post {--title=} {--description=} {--user_id=}';
- update handle method
    public function handle()
    {
        $title = $this->option('title');
        $description = $this->option('description');
        $user_id = $this->option('user_id');

        Post::create([
            'title' => $title != '' ? $title : Str::random(10),
            'description' => $description != '' ? $description : Str::random(30),
            'user_id' => $user_id != '' ? $user_id : 1
        ]);

        $this->info('Blog post created successfully with!!! '. $title. ' as title');
    }
The parameters can be passed in with no particular order.

Running commands with progress bar for the process.
A progress bar can be displayed in the Artisan console when a task is running.
Let's specify how many blog post to create from the command line
- update the $signature
protected $signature = 'blog:create-post {--number_of_posts=}';
- update the handle method
    public function handle()
    {
        $number_of_posts = (int) $this->option('number_of_posts');

        $bar = $this->output->createProgressBar($number_of_posts);

        $bar->start();

        for ($i=1; $i <= $number_of_posts; $i++) {

            Post::create([
                'title' =>  Str::random(10),
                'description' =>  Str::random(30),
                'user_id' => $i
            ]);

            $bar->advance();
        }

        $bar->finish();

        $this->info(' '. $number_of_posts . ' blog posts created successfully with progress bar!!!');
    }


You can look into the Artisan Command in the Laravel documentation for other options to explore for custom commands and how to register them.
Note: Please ensure to always secure or validate the header request of the commands and don't run them from the routes except if you have some sort of middleware to validate the request type if possible with a token.
How about if these commands are needed to be executed at intervals ( every minute, hourly, daily, weekly, monthly etc..) or are we going to always run the commands individually for the application? That's where the scheduler comes into play. With the help of cron jobs, these commands can be executed on the server at the configured intervals which we'll be looking at in subsequent articles.
If you find this article useful please kindly share it with your network and feel free to use the comment section for questions, answers, and contributions.
